Ionic is a popular framework for building cross-platform mobile applications using web technologies such as HTML, CSS, and JavaScript. To build a hotel management app in Ionic 6, you can follow these general steps:
- Define the features and requirements of your hotel management app, such as user authentication, room booking, check-in/check-out management, inventory management, reporting, and analytics.
- Choose a backend technology such as Firebase, Node.js, or PHP to manage the data and handle the server-side logic. Firebase is a popular choice as it provides a real-time database and authentication out of the box.
- Install the Ionic CLI and create a new Ionic project using the command
ionic start. - Choose a UI framework such as Ionic UI components, Material Design, or Bootstrap to design the user interface of your app.
- Create the necessary pages and components for your app, such as login page, room booking page, inventory management page, and reporting page.
- Use Ionic navigation to create a navigation structure for your app, including menus and tabs.
- Integrate with the backend technology to fetch and store data, handle user authentication, and perform server-side operations.
- Test your app on both iOS and Android devices, and use tools such as Ionic Appflow or Firebase App Distribution to distribute your app to users.
- Monitor your app’s performance and user feedback using tools such as Firebase Analytics or Google Analytics, and make improvements and updates as needed.
Building a hotel management app in Ionic 6 can be a complex task, but following these steps will give you a solid foundation to create a functional and user-friendly app.
A payment page on a mobile app is necessary for several reasons:
- Convenience: Mobile payment allows users to make purchases quickly and easily, without having to enter their payment information each time. A payment page on a mobile app allows users to make purchases in just a few taps, which is more convenient than using a desktop website or visiting a physical store.
- Security: A payment page on a mobile app can be designed to use secure payment methods, such as tokenization or encryption, to protect user data. This provides users with a secure and trusted payment experience, which can increase their confidence in using the app.
- Revenue generation: Mobile apps with payment pages can generate revenue by allowing users to purchase products or services through the app. This can be a significant source of income for businesses, especially those that rely on e-commerce.
- Competitive advantage: Mobile apps with payment pages can provide a competitive advantage over businesses that don’t offer mobile payment options. This can be particularly important for businesses that target tech-savvy customers who prefer mobile payment options.
Overall, a payment page on a mobile app can provide many benefits to both users and businesses, including convenience, security, revenue generation, and competitive advantage.
To create a new page in an Ionic project, you can follow these steps:
- Open a command prompt or terminal window and navigate to your Ionic project directory.
- Run the following command to generate a new page:
ionic generate page <page-name>
- Replace
<page-name>with the name of your new page, such as “my-new-page”. - Ionic will generate a new directory with the same name as your page in the “src/app” directory, containing several files including an HTML template, a TypeScript class, and a SCSS stylesheet.
- Open the HTML template file (e.g. “payment.page.html”) and add following codes.
<ion-header>
  <ion-toolbar color='danger'>
    <ion-buttons slot="start" class="menu_btn">
      <ion-back-button color="light" defaultHref="search-chef"></ion-back-button>
    </ion-buttons>
    <ion-title>Payment History</ion-title>
    <ion-icon name="notifications" slot="end" (click)="notificationModal($event)"></ion-icon>
    <ion-badge id="notifications-badge-msg" color="danger">2</ion-badge>
    <ion-icon name="cart" slot="end"></ion-icon>
    <ion-badge id="notifications-badge" color="danger">5</ion-badge>
    <img slot="end" src="../../../assets/001.JPG" (click)="presentModal($event)" />
  </ion-toolbar>
</ion-header>
This is an ion-header element with a ion-toolbar child element, which is a commonly used component in an Ionic app to provide a header for a page. Here is a breakdown of the various attributes and child elements:
ion-header: This is a container element for a page header in an Ionic app.ion-toolbar: This is a child element ofion-headerand represents the toolbar or header itself. It has acolorattribute set to'danger'which sets the background color of the toolbar to a shade of red.ion-buttons: This is a child element ofion-toolbarand is used to display buttons within the toolbar. It has aslotattribute set to'start'which aligns the button to the left side of the toolbar. It also has a CSS classmenu_btn.ion-back-button: This is a child element ofion-buttonsand is a built-in Ionic component for a back button. It has acolorattribute set to'light'which sets the color of the icon to light, and adefaultHrefattribute set to'search-chef'which specifies the page to navigate to when the back button is clicked.ion-title: This is a child element ofion-toolbarand is used to display the title of the page. In this case, the title is “Payment History”.ion-icon: This is a child element ofion-toolbarand is a built-in Ionic component for displaying an icon. It has anameattribute set to'notifications'which specifies the name of the icon to display. It also has aslotattribute set to'end'which aligns the icon to the right side of the toolbar.(click): This is an event binding in Angular which is used to handle a click event on the icon. In this case, when the icon is clicked, it triggers thenotificationModalmethod defined in the TypeScript class of the page.ion-badge: This is a child element ofion-iconand is used to display a badge with a number or text. It has anidattribute set to'notifications-badge-msg'and'notifications-badge'which assigns a unique identifier to each badge. It also has acolorattribute set to'danger'which sets the color of the badge to red.img: This is a child element ofion-toolbarand is an HTMLimgelement which is used to display an image within the toolbar. It has aslotattribute set to'end'which aligns the image to the right side of the toolbar. It also has asrcattribute set to../../../assets/001.JPGwhich specifies the path to the image file. Finally, it has a(click)event binding which triggers thepresentModalmethod when the image is clicked.
<ion-content>
  <div *ngFor="let payment of payment">
    <p id="date">{{payment.date}}</p>
    <div class="upperBox" *ngFor="let item of payment.transactions">
      <div class="img">
        <img src="../../../assets/food/{{item.image}}" />
      </div>
      <div class="title">{{item.title}}</div>
      <div class="price">{{item.amount}}</div>
      <div class="transId">Transaction ID: #{{item.transId}}</div>
      <div class="time">{{item.time}}</div>
      <div class="bank">{{item.bank}} </div>
      <div class="status " [ngStyle]="{'color':(item.status === 'SUCCESS') ? 'green' : (item.status === 'FAILED') ? 'red' : 'orange' }">{{item.status}}</div>
    </div>
  </div>
</ion-content>
This is an ion-content element, which is one of the core components in an Ionic app and is used to display content within a page. Here’s a breakdown of the various attributes and child elements:
ion-content: This is a container element for the content of a page in an Ionic app.*ngFor: This is an Angular directive used to loop through an array and render its elements. In this case, thepaymentarray is being looped through to display each payment object in the array.div: This is an HTML container element used to group content together.p: This is an HTML element used to display text in a paragraph.id: This is an HTML attribute that assigns a unique identifier to an element. In this case, thedateparagraph has anidattribute set to'date'.class: This is an HTML attribute that assigns a CSS class to an element. In this case, theupperBoxdiv has aclassattribute set to'upperBox'.img: This is an HTML element used to display images. In this case, the image source is set using thesrcattribute with the path to the image file located in theassets/foodfolder.*ngStyle: This is an Angular directive used to dynamically apply CSS styles based on conditions. In this case, thecolorstyle is applied to thestatusdiv based on the value of thestatusproperty of theitemobject. If the status is'SUCCESS', the color is set to green. If the status is'FAILED', the color is set to red. Otherwise, the color is set to orange.
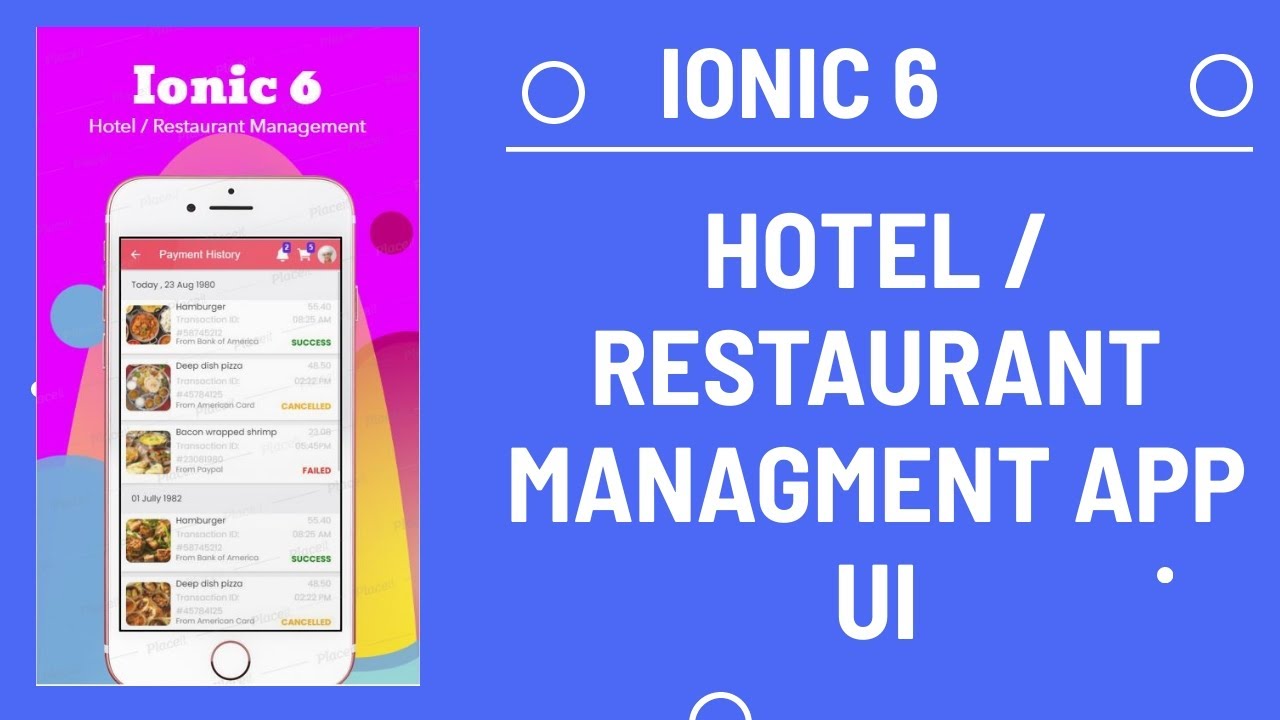
The overall effect of this code is to display a list of payments, each of which contains a date and a list of transactions. For each transaction, the code displays an image, title, amount, transaction ID, time, bank, and status. The status is displayed in a different color based on whether the transaction was successful, failed, or is still processing. The *ngFor directive loops through the payment array to display the payment and transactions in a list. The *ngStyle directive is used to set the color of the status text based on the status of the transaction.
Finally our payment.page.html look like as follows
<ion-header>
  <ion-toolbar color='danger'>
    <ion-buttons slot="start" class="menu_btn">
      <ion-back-button color="light" defaultHref="search-chef"></ion-back-button>
    </ion-buttons>
    <ion-title>Payment History</ion-title>
    <ion-icon name="notifications" slot="end" (click)="notificationModal($event)"></ion-icon>
    <ion-badge id="notifications-badge-msg" color="danger">2</ion-badge>
    <ion-icon name="cart" slot="end"></ion-icon>
    <ion-badge id="notifications-badge" color="danger">5</ion-badge>
    <img slot="end" src="../../../assets/001.JPG" (click)="presentModal($event)" />
  </ion-toolbar>
</ion-header>

<ion-content>
  <div *ngFor="let payment of payment">
    <p id="date">{{payment.date}}</p>
    <div class="upperBox" *ngFor="let item of payment.transactions">
      <div class="img">
        <img src="../../../assets/food/{{item.image}}" />
      </div>
      <div class="title">{{item.title}}</div>
      <div class="price">{{item.amount}}</div>
      <div class="transId">Transaction ID: #{{item.transId}}</div>
      <div class="time">{{item.time}}</div>
      <div class="bank">{{item.bank}} </div>
      <div class="status " [ngStyle]="{'color':(item.status === 'SUCCESS') ? 'green' : (item.status === 'FAILED') ? 'red' : 'orange' }">{{item.status}}</div>
    </div>
  </div>
</ion-content>
Now open payment.page.ts file and add typescript code as follows
import { Router } from '@angular/router';
import { LoadingController } from '@ionic/angular';
import { AppServiceService } from 'src/app/services/app-service.service';
This is an import statement in TypeScript used to import three classes from their respective modules or files:
Router: This is a class from the@angular/routermodule that provides a service for routing within an Angular application. It allows you to navigate to different routes within the application and pass data to those routes.LoadingController: This is a class from the@ionic/angularmodule that provides a service for displaying loading indicators or spinners in an Ionic application. It allows you to display a loading indicator while the application performs an operation in the background, such as fetching data from a remote server.AppServiceService: This is a custom service class that is imported from a file located at'src/app/services/app-service.service'. The purpose of this service is not clear from the import statement alone, but it appears to be a custom service defined within the Ionic/Angular application that provides some functionality.
Importing classes from modules or files allows you to use them in the code of the current module. The classes can then be instantiated or used to access their properties and methods. In this case, the Router class is likely used to navigate to other pages or components within the application, the LoadingController class is likely used to display a loading indicator while waiting for a server response, and the AppServiceService class is likely used to provide some custom functionality or data access within the application.
payment = [];
  constructor(private service: AppServiceService, public loadingController: LoadingController, private router: Router) { }
This code block declares a class with a constructor that takes in three parameters:
service: This is an instance of theAppServiceServiceclass that was previously imported. It is injected as a dependency in the constructor and allows the current class to access the methods and properties of theAppServiceServiceclass.loadingController: This is an instance of theLoadingControllerclass that was previously imported. It is also injected as a dependency in the constructor and allows the current class to display loading indicators or spinners while waiting for a server response.router: This is an instance of theRouterclass that was previously imported. It is injected as a dependency in the constructor and allows the current class to navigate to different pages or components within the application.
In addition to the constructor, this code block also declares a class property called payment and initializes it to an empty array. This property is likely used to store a list of payment transactions that will be retrieved from the server or another data source.
The purpose of this class and its constructor is not entirely clear without more context or code, but it appears to be part of an Ionic/Angular application that is related to managing payment transactions. The AppServiceService class is likely used to make API requests to a server to retrieve payment data, and the LoadingController class is likely used to display a loading spinner while the payment data is being retrieved.
ngOnInit() {
   this.presentLoading().then(() => {
     this.service.getAllPayments().subscribe((res) => {
       this.payment = res.document.records;
       console.log(this.payment);
       this.loadingController.dismiss();
     });
   });
 }
This code block defines a method called ngOnInit, which is a lifecycle hook provided by Angular that is called when the component is initialized. The purpose of this method is to retrieve payment data from a server and assign it to the payment property of the current class.
Here’s a step-by-step breakdown of what the code is doing:
- The
presentLoading()method is called, which displays a loading spinner using theLoadingControllerclass while the payment data is being retrieved from the server. ThepresentLoading()method returns a promise, which resolves when the loading spinner is dismissed. - Once the loading spinner is displayed, the
getAllPayments()method of theAppServiceServiceclass is called, which is likely a method that retrieves payment data from a server using HTTP requests. - The
subscribe()method is called on the observable returned by thegetAllPayments()method. Thesubscribe()method takes a callback function as an argument, which is called when the observable emits a value. - When the callback function is called, it receives the response data from the server as an argument, which is likely in the form of a JSON object.
- The
recordsproperty of the response object is assigned to thepaymentproperty of the current class. Therecordsproperty likely contains an array of payment transactions. - The
console.log()method is called to log thepaymentproperty to the console for debugging purposes. - The
dismiss()method is called on theloadingControllerobject to dismiss the loading spinner.
In summary, the ngOnInit() method is used to retrieve payment data from a server using the getAllPayments() method of the AppServiceService class, assign the response data to the payment property of the current class, and display a loading spinner while the data is being retrieved.
async presentLoading() {
   const loading = await this.loadingController.create({
     message: "Please Wait .. ",
   });
   await loading.present();
 }
This code block defines an asynchronous method called presentLoading() which displays a loading spinner using the LoadingController class.
Here’s a step-by-step breakdown of what the code is doing:
- The
awaitkeyword is used to wait for theloadingController.create()method to return aPromise. Thecreate()method is called on theloadingControllerobject to create a new loading spinner. - The
awaitkeyword is used again to wait for theloading.present()method to return aPromise. Thepresent()method is called on theloadingobject to display the loading spinner. - Once the loading spinner is displayed, the
asyncfunction returns aPromise.
In summary, the presentLoading() method is used to create and display a loading spinner using the LoadingController class. It is an asynchronous method that returns a Promise. When this method is called, it displays a loading spinner with a message “Please Wait .. ” until the loading.present() method is resolved.
Finally our payment.page.ts file look like as follows
import { Component, OnInit } from '@angular/core';
import { Router } from '@angular/router';
import { LoadingController } from '@ionic/angular';
import { AppServiceService } from 'src/app/services/app-service.service';

@Component({
  selector: 'app-payment',
  templateUrl: './payment.page.html',
  styleUrls: ['./payment.page.scss'],
})
export class PaymentPage implements OnInit {
  payment = [];
  constructor(private service: AppServiceService, public loadingController: LoadingController, private router: Router) { }

  ngOnInit() {
    this.presentLoading().then(() => {
      this.service.getAllPayments().subscribe((res) => {
        this.payment = res.document.records;
        console.log(this.payment);
        this.loadingController.dismiss();
      });
    });
  }
  async presentLoading() {
    const loading = await this.loadingController.create({
      message: "Please Wait .. ",
    });
    await loading.present();
  }


}